Are you tired of looking at your outdated furniture? Discover the DIY hacks to refresh your old furniture and give your home a new look without breaking the bank. With a little creativity and some simple tools, you can transform your old furniture into beautiful, functional pieces.
This article will guide you through the process of giving your old furniture a new life. You’ll learn how to identify the potential in your old furniture and turn it into something unique and stylish.
Key Takeaways
- Learn simple DIY hacks to refresh your old furniture
- Discover creative ways to upcycle your furniture
- Get tips on refinishing and restoring old furniture
- Find out how to give your home a new look without overspending
- Explore your creativity and make unique furniture pieces
Understanding the Value of Old Furniture

Renewing old furniture is a fulfilling task that helps you and the planet. By upcycling, you cut down on waste and support green living at home.
Upcycling furniture ideas span from basic cleaning to complex makeovers. This creative journey not only breathes new life into furniture but also makes your space uniquely yours.
Choosing to repurpose furniture makes your lifestyle greener. You can restore old pieces with furniture restoration techniques like repainting or reupholstering. This approach gives them a new look without using new materials.
By embracing repurposing old furniture and upcycling, you reduce environmental harm. You also craft unique, useful items with a story. It’s a blend of creativity and eco-awareness, enhancing your home’s beauty and sustainability.
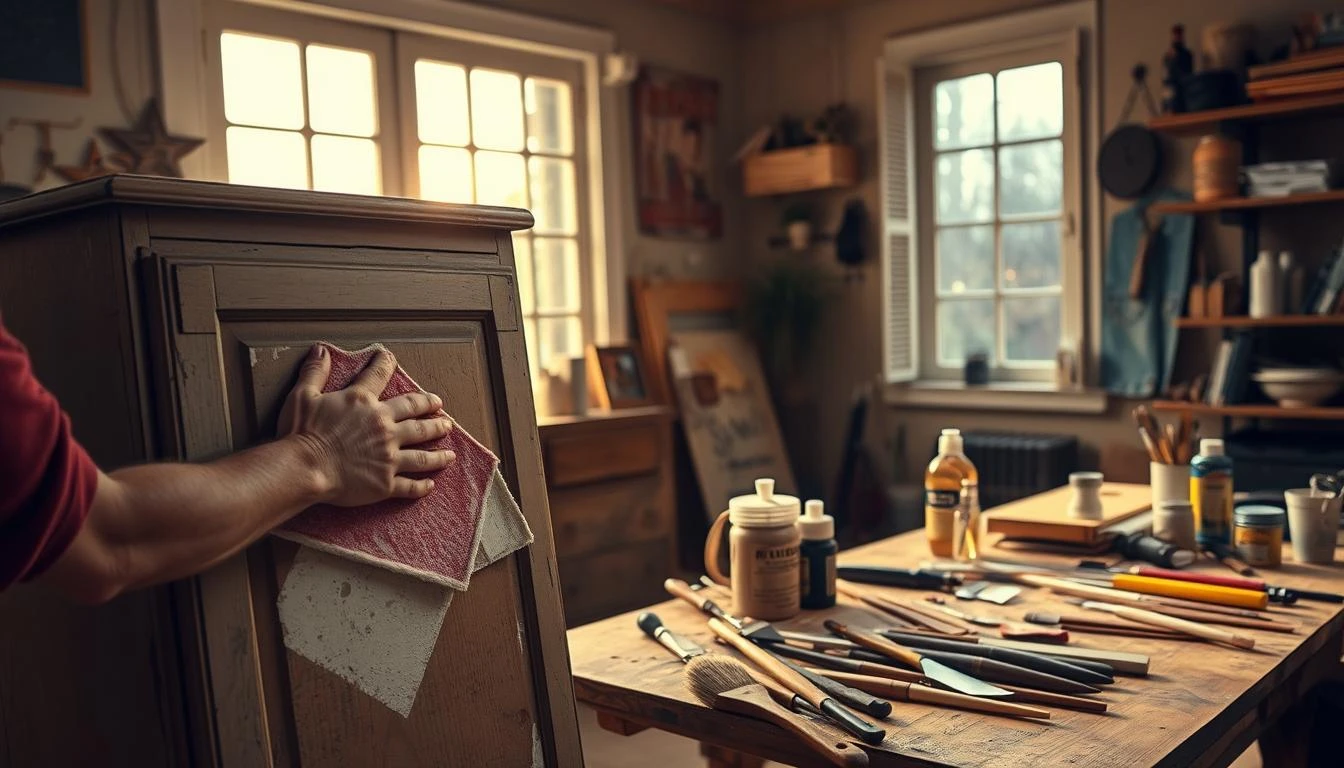
Simple Cleaning Hacks Before You Start
A good cleaning is key to a successful furniture refinishing project. Before you start painting, reupholstering, or using DIY hacks, make sure your furniture is clean. It should be free from dirt, grime, and old wax.
Essential Cleaning Supplies
First, collect your cleaning tools. You’ll need a soft cloth, mild soap, warm water, and a gentle scrubber. For tough stains or special materials like wood or metal, you might need special cleaners.
Cleaning Different Materials
Each material needs a different cleaning method. Wooden furniture can usually be cleaned with soap and water. Metal or glass surfaces need a gentle cleaner to avoid streaks or residue. Fabric furniture needs a gentle fabric cleaner, and leather requires a leather-specific cleaner.
Dealing with stubborn stains can be tough, but it’s doable. For wood, try a wood cleaner or baking soda and water. For fabric, treat the stain before cleaning. Use a leather stain remover for leather.
By using these cleaning tips, you can breathe new life into your old furniture. Cleaning is a vital step in easy furniture upgrading and cheap furniture refurbishing. It prepares the surface for refinishing and ensures a professional finish.
Creative Painting Ideas to Transform Your Furniture

You can give your old furniture a new life with creative painting. Painting is a great way to make your furniture unique and show off your style.
First, pick the right paint for your furniture. Wooden pieces need latex or chalk paint, while metal needs rust-resistant enamel. Always clean and sand the surface for a smooth finish.
Next, choose your colors. You can go for a bold single color or a distressed look. Try ombre or stenciling for something different.
For a professional look, use thin paint coats. Let each coat dry before adding the next. This avoids drips and unevenness. Use primer for dark or bold colors, or glossy surfaces.
Other ideas include metallic paints for a modern look or unique brush strokes. Don’t be afraid to experiment and find what works for you.
By following these tips, you can make your furniture look amazing and tell a story. So, pick up your paintbrushes and start making your furniture special.
Interesting Ways to Reupholster Old Chairs

Give your old chairs a second chance with a creative reupholstering makeover. Reupholstering is more than just new fabric. It’s about giving a piece of furniture a new life, keeping its memories or unique character.
To start, pick the right fabric. Think about your chair’s style, the room’s décor, and how durable you need it. For a vintage chair, choose fabric that matches its age, like a classic floral or a rich solid color. For something modern, bold patterns or bright colors can stand out.
Step-by-Step Reupholstering Process:1. Carefully remove the old upholstery to avoid damage.
2. Check and fix any worn-out parts, like the frame or springs.
3. Cut your new fabric to fit all surfaces, making sure it’s big enough.
4. Start attaching the fabric from the bottom up, using tools like a staple gun or upholstery tacks.
For extra flair, use contrasting thread for stitching or add embellishments like buttons or trim. These details can turn your reupholstered chair into a work of art.
Reupholstering old furniture gives it a new life and supports sustainable living by reducing waste. With these furniture restoration techniques, you can make your old chairs unique and functional, showing off your personal style.
Using upcycling furniture ideas refreshes your furniture and makes it a conversation starter. Whether it’s a family heirloom or something you found at a thrift store, reupholstering is a fun DIY project that’s both creative and practical.
DIY Decoupage for Quick Furniture Refresh

Discover how decoupage can be your go-to method for a quick DIY furniture makeover. This technique involves gluing cut-out images onto your furniture and sealing them with a finish. It gives your pieces a completely new look without the need for extensive renovation.
To start, you’ll need a few basic supplies: your chosen cut-out images, a decoupage medium (such as Mod Podge), a brush, and a sealant (like varnish). You can find these materials at most craft stores or online.
The key to a successful decoupage is applying a smooth, even layer of decoupage medium. Begin by applying a thin layer to the furniture surface, then carefully place your cut-out image on top. Smooth out any air bubbles or wrinkles with your brush, working from the center outwards. Finish with another layer of decoupage medium on top.
For an easy furniture upgrading, consider using images that contrast with the original color of your furniture. Floral patterns, geometric shapes, or abstract designs can add a modern touch. You can also use decoupage to match your furniture with your home’s décor, creating a cohesive look.
A creative furniture renewal can be achieved by layering different images or using different sizes and shapes. Experiment with various techniques until you find the one that works best for you. Once you’re happy with the design, seal it with a varnish to protect it from wear and tear.
Decoupage is not only a fun project but also a cost-effective way to give your furniture a fresh new look. With these simple steps, you can achieve a professional-looking result that will breathe new life into your old furniture.
Utilizing Stencils for a Unique Touch

Old furniture can get a new life with stencils. They are a great furniture refinishing tip for adding a personal touch. You don’t need to do a big renovation.
There are many stencils to choose from. You can find them at craft stores or online. You can also make your own designs. For a rustic feel, try floral or geometric patterns. For something modern, go for abstract or minimalist designs.
To use stencils, first clean and dry your furniture. Pick a paint that fits your furniture’s material. Use a brush or foam roller to apply it. To avoid mess, use stencil adhesive or tape to hold the stencil in place. Work in small parts and let the paint dry before removing the stencil.
Layering stencils is a cool way to revamp furniture. You can mix different patterns and colors. Start with a base coat, then add more designs. This makes your piece truly unique.
Stencils are also a budget-friendly way to refurbish furniture. Instead of buying new, you can update your old furniture. Stenciling is a fun DIY project that can be done in a weekend.
Think about your desired look when stenciling. Consider the colors, room style, and how stencils can improve the feel. With creativity, you can turn old furniture into something beautiful and personal.
Adding Texture with Wood Staining

Wood staining is more than just adding color. It brings out the texture and character of your furniture. The right stain and technique can turn an old piece into a stunning, unique item. It adds warmth and character to any room.
For a DIY furniture makeover, wood staining is a simple yet effective method. It changes the look of your furniture without replacing it. This is both cost-effective and eco-friendly. To start, you need to pick the right stain for your project.
There are many wood stains to choose from, like oil-based, water-based, and gel stains. Oil-based stains give a rich, durable finish. Water-based stains are easier to clean up and dry faster. Gel stains work well on vertical surfaces because they’re thicker and less drippy.
Before staining, prepare your furniture. Clean the surface to remove dirt and grease. Sand it to smooth out the wood. If needed, apply a wood conditioner for a smooth finish.
How you apply the stain affects the look. You can use a brush, cloth, or foam applicator. For an even look, use long strokes. For a distressed look, use a rag to apply and remove stain, creating a unique texture.
One creative furniture restoration technique is trying different stain colors and combinations. You can get from a natural look to a bold, vibrant color. Always test stains on a small area first to get the right look.
Wood staining works on many furniture pieces, like tables, chairs, cabinets, and shelves. With practice and patience, you can master wood staining. This way, you can give new life to old furniture, making it a beautiful part of your home decor.
Installing New Hardware to Revamp Cabinets

Updating your cabinets with new hardware is easier than you might think. It’s a simple way to revamp old furniture without a big renovation.
Choosing the right hardware can really change your cabinets. You can pick knobs, handles, or pulls that match your cabinets’ style. For example, modern cabinets might look great with sleek handles, while traditional ones could pair well with ornate knobs.
Before starting, measure the old hardware to ensure the new pieces fit. You can use a template or measure the distance between screw holes. With your new hardware, the installation is easy. You’ll need a screwdriver and maybe a drill for different screw placements.
There are many ways to revamp old furniture. You can mix different styles, like modern knobs with traditional handles. Also, think about the hardware’s finish. Brass, bronze, and silver can add elegance to your cabinets.
Installing new hardware not only improves your cabinets’ function but also gives them a new look. This DIY project is a fantastic way to repurpose old furniture and make it look brand new.
Using Wallpaper for Unexpected Refreshes

Using wallpaper on furniture is a smart DIY trick. It can give old pieces a new look. A dull dresser or bookshelf can become a room’s highlight with a few easy steps.
First, pick a wallpaper that fits your room’s style. Think about the colors, patterns, and textures in your space. Bold patterns can add a striking contrast, while subtle designs can enhance what’s already there.
Before applying wallpaper, make sure the furniture is clean and dry. You can cover drawers, doors, or shelves. Using wallpaper on dresser drawers can be a fun surprise when you open them.
For a smooth application, use good-quality adhesive and follow the instructions. Remove any air bubbles or wrinkles to get a professional look.
Adding wallpaper to your DIY project can make your furniture unique and creative. It’s a simple yet powerful furniture refinishing tip that can change your home’s look.
Upcycling Ideas for Shelves and Tables

Turning old shelves and tables into art is simple with these ideas. You can make your furniture look new without buying expensive items.
Repurposing old furniture saves money and helps the environment. For example, an old ladder can become a bookshelf with wooden steps and brackets.
Make an old table into a kitchen island or vanity desk. Add casters for moving it, paint it, or change the hardware for a modern feel.
For a rustic vibe, try cheap furniture refurbishing like distressing wood or adding metal. This gives your furniture a vintage look that adds charm to any space.
Upcycling furniture makes your home look better and provides storage. By being creative with old furniture, you can make unique pieces that show your style.
Utilizing Fabric to Create Soft Furnishings
One simple way to update your furniture is by using fabric for cushions and panels. This method boosts your furniture’s look and adds comfort. It’s a great DIY furniture makeover idea.
Begin by making new cushions for your chairs or sofas. Pick a fabric that matches your furniture’s color and style. For example, a vintage armchair looks amazing with a bold, modern fabric. This easy furniture upgrading trick can change a room’s whole vibe.
Another creative idea is adding fabric panels to your furniture. You can attach them to dressers, headboards, or shelves. This adds texture and interest, making your furniture pop in your decor. It’s a creative furniture renewal that’s easy to do.
When using fabric, think about its durability and upkeep. For busy areas or often-used pieces, choose fabrics that resist stains and are easy to clean. This keeps your furniture looking good for longer.
Lastly, feel free to mix different fabrics and patterns. Combining textures and colors brings depth and personality to your furniture. It’s a way to make your space unique and show off your style.
Final Touches: Accessorizing Your Furniture
Now that you’ve updated your old furniture, it’s time for the final touches. Adding decor can really change how your space looks. Pick items that match your furniture’s style and era. Layering accessories can also add a special touch.
To keep your furniture looking great, use protective coatings and avoid harsh chemicals. Regular cleaning and dusting are key. These steps will help your furniture last longer.
Updating old furniture is good for your wallet and the planet. It gives old items a new lease on life. This way, you create a space that’s both unique and sustainable, showing off your personal style.